
How to Set Up Windows 11 Safely Step-by-Step Guide
Overview
Windows 11 offers better security, faster performance, and a new look. This article will guide you through every step of the setup process, regardless of whether you’re upgrading from Windows 10 or setting up a fresh installation.
Step 1: Check System Requirements
Before installing Windows 11, ensure your device meets the minimum requirements:
- Processor: 1 GHz or faster with 2 or more cores on a compatible 64-bit processor.
- RAM: 4 GB or more.
- Storage: At least 64 GB.
- TPM: Trusted Platform Module (TPM) 2.0 enabled.
- Graphics Card: Compatible with DirectX 12 or later.
- Display: HD screen with at least 720p resolution.
To check your device compatibility, use the PC Health Check tool from Microsoft.
Step 2: Back Up Your Data
If you are upgrading or performing a fresh install, backing up important files is crucial. Use the following methods:
- OneDrive: Upload files to the cloud.
- External Drive: Copy files to an external hard drive or USB.
- Windows Backup: Create a system image for recovery.
Step 3: Download Windows 11 Installation Media
To begin the installation, download the official Windows 11 setup files from Microsoft:
- Go to the Windows 11 Download Page.
- Select Create Installation Media or Upgrade Now.
- If creating installation media, download the Media Creation Tool.
Step 4: Create a Bootable USB Drive (For Clean Install)
If you are performing a fresh install, follow these steps to create a bootable USB:
- Insert a USB drive (at least 8 GB).
- Open the Media Creation Tool and select Create Installation Media.
- Choose Windows 11 edition and preferred language.
- Select USB Flash Drive and follow the prompts.
- Once complete, restart your PC and boot from the USB.
Step 5: Install Windows 11
1. Boot from USB (For Clean Installation)
- Restart your computer and press the Boot Menu Key (usually F12, F9, or Esc).
- Select your USB drive and begin installation.
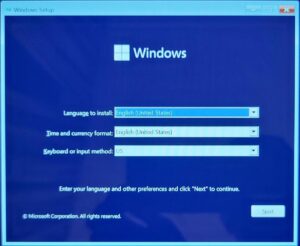
2. Follow Setup Wizard
- Choose Language and Time Zone.
- Click Install Now.
- Enter your Windows 11 Product Key (or select “I don’t have a key”).
- Choose Custom Install for a clean installation or Upgrade if migrating from Windows 10.
Step 6: Configure Windows 11 Settings
After installation, configure these essential settings:
1. Set Up Your Account
- Use a Microsoft account for syncing and security.
- Create a local account if preferred.
2. Customize Privacy Settings
- Disable unnecessary tracking features (such as location or ad personalization).
- Configure permissions for apps.
3. Enable Updates
- Go to Settings > Windows Update.
- Install the latest updates for drivers and security patches.
Step 7: Install Essential Drivers
For optimal performance, install necessary drivers
- Graphics Drivers (NVIDIA, AMD, Intel).
- Chipset Drivers (from the motherboard manufacturer).
- Wi-Fi & Bluetooth Drivers (from the device manufacturer).
Step 8: Optimize Performance & Settings
1. Personalize Your Desktop:
- Change wallpaper, themes, and taskbar settings.
2. Adjust Power Settings:
- Optimize battery usage (especially on laptops).
- Enable High Performance Mode for gaming or heavy tasks.
3. Install Essential Software:
- Security Software (Microsoft Defender or third-party antivirus).
- Productivity Tools (Office, browser, media players).
- Gaming or Development Tools (if applicable).
Step 9: Set Up Backup & Recovery Options
Prepare for future system recovery:
- System Restore: Enable restore points.
- Recovery Drive: Create a backup USB.
- Cloud Backup: Store important files online.
i hope this article How to Set Up Windows 11 Safely helps you to setup windows 11
